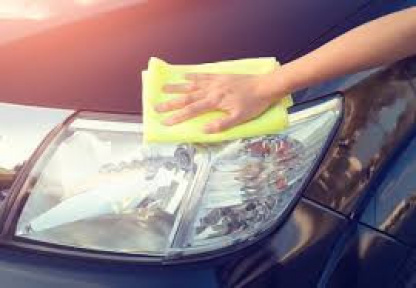
Sometimes you just notice that your headlight is looking a bit dull. You can bring back the shine by giving them a good clean! Dull headlights can be a safety hazard, not to mention they can also get you pulled over. But don't worry, there is a way to clean them and restore their shine!
Why do headlights become foggy and dim?

There are a few reasons why your headlights may become foggy and dim. One reason is because of the build-up of dirt, grease, and grime. Another reason is due to exposure to UV rays from the sun, which can cause the material to degrade and yellow over time. That is all because headlights are not made with the best materials.
The basic reason why your headlights become dim is because of the material used to make them. Polycarbonate is a type of hard plastic that is commonly used in headlight lenses. It is durable and can withstand a lot of abuse, but it is also very prone to yellowing and fading over time. This is why you often see older cars with much clearer headlights than newer ones.
Finally, some additional reasons for your headlights becoming foggy with age is because of the condensation that can form inside the headlight lens. This is especially common in cold weather climates where the temperature difference between the inside and outside of the car can cause condensation to form.
How to clean foggy headlights?
If your headlights are starting to look a bit dull, then you'll want to give them a good cleaning. To clean headlights, toothpaste and baking soda paste can be used. The fog is abrasive enough to remove without scratching or damaging the headlights, thanks to both items. Rain-X, for example, may polish away minor scratches on the car's finish. This will also help to protect the headlight from future damage.
To make the cleaning paste, mix together one tablespoon of toothpaste with two tablespoons of baking soda. Apply the paste to the headlight and use a soft cloth to rub it in. Rinse the headlight off with water and dry it with a clean cloth.
If your headlights are extremely foggy, you may need to repeat this process a few times. You can also try using a stronger cleaning solution, such as vinegar or rubbing alcohol. Be sure to test any cleaner on a small area of the headlight first to ensure that it does not damage or discolor the plastic.

Does toothpaste really clean foggy headlights?
You might be able to clear a grimy headlight with toothpaste, but in some cases, you'll need to sand it down and use a professional polishing compound. Moreover, in case your headlights are severely foggy and dim, then it is recommended that you replace them.
When toothpaste is used to clean headlights, it is important to use a non-abrasive variety. Colgate's Cavity Protection and Tom's of Maine Anticavity Fluoride Toothpaste are two examples of non-abrasive kinds of toothpaste. Abrasive toothpaste, such as those with baking soda, can damage the headlight lens. Toothpaste can help to remove minor scratches from the headlight lens. However, if the scratches are deep, then they will need to be sanded down before being polished.
What toothpaste works best to clean headlights?
You'll get the best results from Colgate with peroxide or baking soda because whitening kinds of toothpaste have more grit than non-whitening pastes. Go for paste rather than gel, as it's thicker. If you do go for a gel, look for one that has micro beads in it - these act as a scrubbing agent. Colgate is a good brand to try, as they have both a whitening paste and a gel with microbeads.
Does WD-40 clean foggy headlights?
If you have an upcoming car test and are wondering if you can quickly defog your headlights for approval, the answer is yes! It can be used as a car headlight cleaner. With WD-40, you can clean your car headlights in just a few minutes.
To start, park your car in a well-lit area so you can see what you're doing. Next, grab a can of WD-40 and a rag. Spray the WD-40 onto the headlight, making sure to cover the entire surface. You don't need to soak it, but you want to make sure the headlight is evenly coated.
Once the headlight is coated, take your rag and wipe off the WD-40. You'll notice that the fogging will start to come off with it. Keep wiping until the headlight is clean. If there are any stubborn areas, you can spray more WD-40 and scrub with the rag until it's gone.
After you're finished cleaning the headlight, use a dry rag to wipe off any excess WD-40. You don't want to leave any residue on the headlight, as it can cause further fogging. Once you're done, your headlights should be clear and ready for the car test!

Will lemon and baking soda clean your headlights?
Cleaning the headlights on your car is important for maintaining optimal visibility while driving, and there are many ways to do it. You can buy a special solution from the store, or use something simple like lemon and baking soda.
Lemon and baking soda is a natural way to clean your headlights, and it's also pretty effective. Just mix equal parts lemon juice and baking soda together, then apply it to the headlight with a clean cloth. Rub in a circular motion until the headlight is clean, then rinse with water.
If your headlights are really dirty, you may need to repeat this process a few times. But overall, lemon and baking soda are a great way to clean your headlights without using any harsh chemicals.
Will vinegar clean cloudy headlights?
Vinegar is an excellent tool for cleaning foggy or discolored headlights. Washing or spritzing the headlight with vinegar might be able to remove surface dirt and grime. If your headlights have gotten hazy, foggy, or yellowed over time, try using a solution of baking soda and vinegar. This natural cleaning method is effective and safe for your car's delicate headlight lenses.
To clean your headlights with vinegar, start by mixing equal parts water and vinegar in a bowl or bucket. Then, wet a clean cloth with the solution and use it to wipe down your headlights. Once you've cleaned the surface of the headlights, rinse them off with clean water to remove any residue. Finally, dry the headlights with a clean towel or let them air-dry. If your headlights are still foggy after cleaning them with vinegar, try using a headlight restoration kit.
Be careful with cloudy headlights, as they can reduce your visibility while driving and lead to accidents. If you're not comfortable cleaning your headlights with vinegar, take them to a professional to have them cleaned or restored.
Can Coca-Cola clean headlights?
You don't need any special chemicals to clean your headlights - Coca-Cola will do the job just fine. The process is brief and easy to follow: make sure your headlights are wet, but not soaked, then apply Coca-Cola liberally. The truth is that Coke is made of acids. Acids, by definition, break things down. That's why Coke can be used to clean car batteries and remove rust. So when you use it to clean your headlights, the acidity in the Coke will eat away at the grime and gunk that's making your headlights foggy.
Once you've applied the Coke, give it a few minutes to work its magic, then wipe it away with a clean cloth. You should see a significant difference in the clarity of your headlights. If they're still not as clear as you'd like them to be, you can repeat the process until they're sparkling clean. Coca-Cola isn't just good for cleaning headlights - it can also be used to clean ovens, remove blood stains, and unclog drains. So next time you're looking for a cleaning solution, don't forget the power of Coca-Cola.

Does rubbing alcohol clean headlights?
Denatured alcohol is key for this hack. To clean your headlights, soak a rag in the alcohol and then use it to polish the headlights for several minutes, applying constant pressure. Remember that they may still look foggy until the alcohol evaporates.
To use rubbing alcohol to clean headlights, first purchase a bottle of 99% rubbing alcohol from a drug store. Next, pour some of the alcohol into a clean rag and then rub the headlight with the rag for several minutes. The headlight should now be clean. If it is still foggy, repeat the process until the headlight is clear.
Cleaning headlights with rubbing alcohol you should avoid using too much pressure, as this can scratch the headlight. You should also be sure to clean both the inside and outside of the headlight. Finally, remember that the headlight may still look foggy until the rubbing alcohol evaporates.
If your headlights are only mildly foggy, you may be able to clean them with a headlight restoration kit. These kits typically include sandpaper and a polishing compound that you can use to sand down the layer of oxidation and then polish the headlight. For more serious cases of fogging, you may need to replace the headlight entirely. This is typically only necessary if the headlight is cracked or otherwise damaged.
Will sanding help to clean foggy headlights?
Sanding is the process of using an abrasive to wear away at the material. In this case, you would be using sandpaper to try and remove the hazy, cloudy film that has built up on your headlights. In order to sand your car`s headlights, you will need:
- Sandpaper
- A drill
- Polishing compound
- Masking tape
Instructions:
- Begin by tapping off the area around the headlight with masking tape. This will protect your car`s paint from being scratched by sandpaper.
- Next, use a drill to attach the sandpaper to the headlight. Make sure that the sandpaper is wet before you start sanding.
- Start sanding the headlight in a circular motion. Sand until the hazy film has been removed and the headlight is clear.
- Once you have finished sanding, use a polishing compound to buff out any scratches that may have been caused by the sandpaper.
- Finally, remove the masking tape and enjoy your newly cleaned headlights!
Note, that sanding must be gentle and even, or there is a risk of damaging the headlight. If your headlights are severely damaged, it is best to replace them entirely.
Conclusion
When you want to know how to clean foggy headlights, there are a few different methods that you can try. You can use Coca-Cola, rubbing alcohol, or sandpaper. For mild cases of fogging, you may be able to clean them with a headlight restoration kit. However, for more severe cases, you may need to replace the headlight entirely. Whichever method you choose, be sure to follow the instructions carefully to avoid damaging your headlights.


