Headlight upgrades are among the easiest ways to customize your car or truck, and installing LED pods is no exception. These devices are straightforward to install once you understand the process.
Before deciding to install LED pods, it's essential to consider their practicality and legality. They are not road-legal due to their intense brightness, which may cause danger to other drivers. Thus, covers are necessary if you plan to drive within city limits.
This article will guide you through the nuances of installing LED pods in your vehicle.

What Are LED Light Pods?
LED light pods are additional light sources that can be installed inside headlights to enhance illumination. These pods are not typically found in regular city cars but are more suitable for off-roading and overlanding builds.
Some off-roading vehicles are specifically designed to accommodate such additional lighting. You can easily install them in jeeps, trucks, heavy-duty vehicles, tractors, and more. Generally, you may need to make some adjustments to fit them in.
LED pods can be incorporated not only into high beams or low beams for better visibility but can also be a part of Daytime Running Lights (DRLs) or fog lights, making them quite versatile.
Are LED Light Pods Legal?
So, LED pods are to install and can be quite useful. But they also have a major drawback. They are too good to be legal.
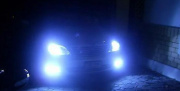
They create some much dense light that you cannot even drive with uncovered LED pods in your headlights. Let alone being using them in the streets. But these babies are so bright they can blind other drivers and potentially cause dangerous accidents.
This brightness earned LED pots some notoriety in the online automotive community. Some car owners claim that these tiny pods are much brighter than any brightest LEDs or HIDs.
You will need to get special pod light covers to make them pass as slightly more legal modification. They can be made of metal, plastic, or silicone-like rubber. And they are not expensive. The cheapest are under only $10, but if you want to get fancy, there are more durable and luxurious options for about $55 per pair.
What Are LED Light Pods Good For?
LED pods come in handy when even the brightest headlights are not enough. They are mostly popular among drivers in both overlanding and off-roading communities. There is really little benefit from installing LED pods for anything less than exploring the wild.
These balls of light can easily outshine even the brightest available LED and HID headlights. This exceptional brightness renders them useless for regular city driving. They are simply too bright and will definitely blind the oncoming traffic.
LED light pods provide superior visibility. They allow you to see much further in the dark. This gives you a much-needed advantage while tackling off-road trails.
You can also use them to illuminate the campsite while you relax with your friends and family. LED pods require little energy and will not drain the battery much if left on for some time.

Headlight LED Pods Installation Step-by-Step
Installing LED pods is relatively straightforward compared to headlight conversion, as they are typically mounted on top. With the correct kit and tools, and a decided mounting spot, you can get started.
This process requires minimal effort from your side. Just get the right kit, grab your instruments, and decide exactly where you want them mounted.
Step 1
Find a place where you want to attach the mounting. Once you find a good location on your front grille, bumper, roof rack, or somewhere else, make sure the pods will not block the view or start directly at oncoming traffic. This will be less of a problem once they are covered, but it will save you from some stink eyes.
Step 2
If the LED pods come with special brackets, put them together with hardware from the set. I recommend avoiding other hardware to make sure everything is secured. You don't want any vibration.
Step 3
Once you attach the pods to the brackets, install those brackets in the chosen location.
Step 4
First, you need to disconnect the vehicle's battery to ensure your safety. Then, get the wiring harness and connect the positive and negative wires to the corresponding terminals. Use the color-coded diagram not to make mistakes. Usually, red is positive while black is negative, but don't blame me if you fail to check it and accidentally burn the pods.
Step 5
Carefully run the wiring harness from the pots you just installed to the vehicle's battery. And make it clean.
Step 6
You must ground the connection by connecting the black or negative wire to a suitable grounding point on the chassis. Make sure there is no paint or other insulating materials in the way.
Step 7
Test if the pods work and make sure the wiring is secure.
Step 8
Turn the lights on and carefully adjust their position. They should illuminate the way before you but look slightly downwards to not glare into other drivers' eyes.
And that's about it. Congratulations, you have just installed your new amazing LED pods.
Where Do You Mount LED Pods?
Only some offroaders realize that LED light pods can be installed in many different locations on the vehicle. You can either integrate them inside the grille or mount them atop the roof rack or somewhere else. Each mounting place has some benefits and drawbacks.
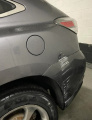
Let's start with the most obvious one, the integrated LED pods. Since they are basically hiding inside the grille, there isn't much you can do to cover them up. This is potentially problematic because, in some states, you can get in trouble even with the LED pods turned off just because they're not covered.
That is different for every other type of mounting: roof rack mounts, A-pillar mounts and roll cage mounts can all be easily covered. But they look bulky and reduce aerodynamics.
However, for many off-roaders, the chunkier, the better. A strong off-roading vehicle should also look strong and bulky. That's the point.
These types of mountings also make it easier to maintain, clean and replace the pods if necessary. Yes, LED lights last very long but can still be physically damaged while off-roading. So keep that in mind, just in case.

What Is the Difference Between LED Light Bars and Pods?
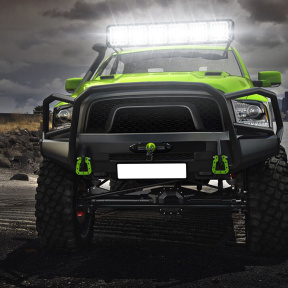
Well, first of all, the difference is in the shape. LED bars look like a single line of diodes, while LED pods are all individual lights. They also differ in mounting options since you cannot actually integrate a light bar.
The biggest benefit of using pods instead of a bar is that it's not the end of the world if they take damage. Only the damaged pods might go out, but the rest would still function. But if you damage a bar instead, it might just die completely, leaving you only with your headlights.
But both are great for off-roading and overlanding. They both function as great auxiliary lights, improving visibility and providing enough light for a comfy campsite.
Do LED Light Pods Need a Relay?
That actually depends. If you have a set of LED pods that don't need too many amps, there is no need for a relay. But similarly to larger LED bars, if your pods require more power to shine brighter, you should definitely install one.
It's easy to know if you need to install a relay. It's usually clearly stated in the installation instruction, and a relay is included inside the kit.
Normally LED lights do not require relays to work, so it's more of an exception. But nothing bad will come with it if you install a relay, just in case. It's a good idea to back yourself up if you are not quite sure about the amperage or fuses.
How Many Pod Lights Do I Need?
The number of LED light pods you need to install depends solely on your preferences. If you can squeeze in more and want more, by all means, install more. This is your party.
The LED light pods for off-roading are sold individually or in sets. Depending on the mounting, you can fit in a certain amount of pods. I recommend buying a mounting together with LED pods in a neat set because it's simpler.

Reviewed by Brent Ordway
Brent Ordway is an ASE-certified car technician. He has been working on cars since he was a teenager and loved helping people keep their vehicles running smoothly. Brent's skills as a mechanic are unrivaled. In 2022, he earned his place on the list of winners for the ASE Master Automobile Technician of the Year award.
Follow me